Git for Beginners: Basics and Essential Commands
Introduction
Every developer, at some point, faces this problem: files get overwritten, changes are lost, and it becomes impossible to remember what worked yesterday and what broke today. As projects grow and multiple people start working on the same codebase, managing changes manually becomes unreliable and risky. This is where Git comes in.
In this blog, we will understand what Git is, why it is used, its core concepts, and the essential commands every beginner must know. By the end, you will also see a simple developer workflow using Git from scratch, making it easier to apply Git in real projects immediately.
Understanding Git
Git is a tool used to track changes in a project over time. When you work on code, files are constantly modified, added, or removed. Git keeps a record of these changes so you can understand how the project evolved and return to an earlier state when needed.
Instead of treating a project as a single changing folder, Git stores a series of saved versions of the project. Each version represents the complete state of the project at a specific point in time, not just individual file changes.
Git is used because change is a normal part of development. Features are updated, bugs are fixed, and mistakes happen. With Git, developers can experiment safely, review what changed, and recover from errors without losing previous work. It also provides a clear history of changes, which becomes important as projects grow or when multiple people work on the same codebase.
At its core, Git helps developers maintain control over their code and its history.
Let us now look at some of the core concepts that make Git work.
Repository
A repository is where Git stores the complete history of a project, including all files and their changes over time. It lets Git track modifications, compare versions, and restore earlier states when needed. Without a repository, Git cannot manage the project or understand its history. Every commit, branch, and file version exists inside the repository.
It acts as the foundation of Git, enabling you to organize, control, and review your work effectively.
Commit
A commit is a snapshot of your project at a specific point in time. It records the current state of files along with a message describing the changes. Commits break work into small, meaningful checkpoints, making it easier to track progress and locate issues.
Each commit builds on the previous one, forming a history of how the project evolved. This history allows you to recover from mistakes and understand changes over time.
Branch
A branch is an independent line of development within a repository. It lets you work on changes without affecting the main project. Each branch has its own sequence of commits, allowing safe experimentation or development of new features.
Branches make parallel work possible and reduce risk by keeping unfinished or experimental work separate. Later, branches can be merged into the main project once the changes are ready.
Head
HEAD is a pointer that shows which commit you are currently working on. It usually points to the latest commit of the branch you are on. When you switch branches or move between commits, HEAD updates to reflect your current position. Git uses HEAD to determine which version of the project should appear in your working directory.
Every new commit is added on top of the commit that HEAD points to. Understanding HEAD is important because many Git operations depend on it, and it defines the present state of your project.
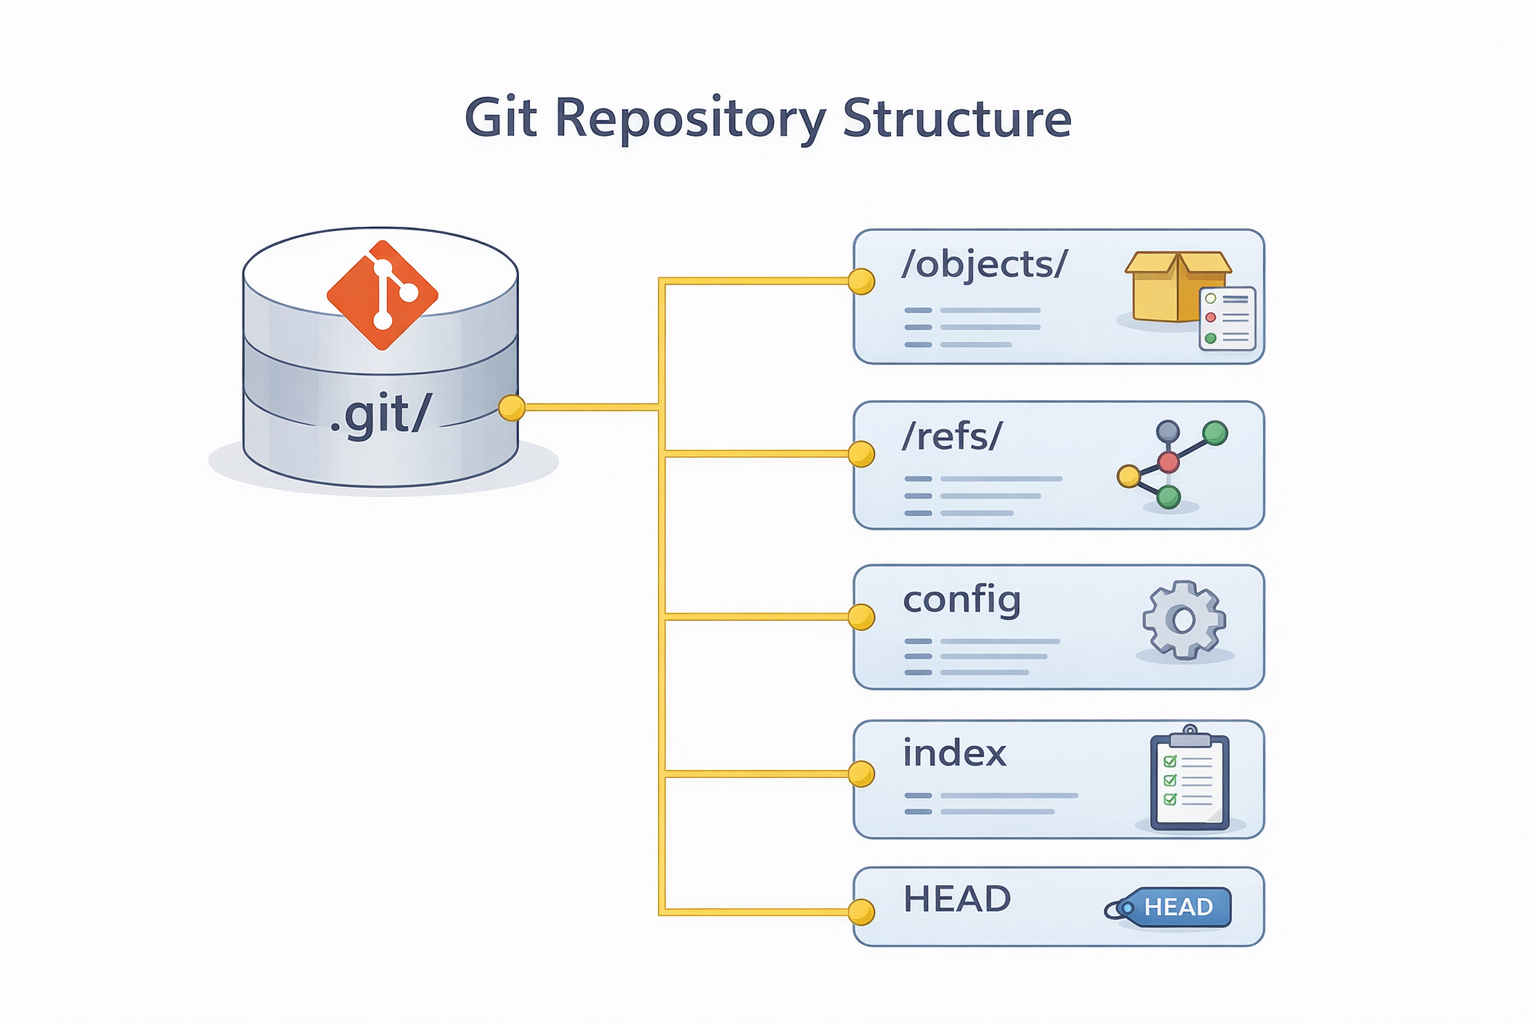
Initializing a Git Project
Before Git can track anything, a project must be turned into a repository. This is done by initializing Git inside the project directory.
The git init command creates a new Git repository. It sets up the internal structure Git needs to track files, commits, and history. After this step, Git becomes aware of the project and can start monitoring changes.
At this stage, Git does not track files automatically. It only knows that the directory is now a repository. Files must still be added and committed before they become part of Git’s history.
To check the current state of the repository, Git provides a way to see which files are tracked, untracked, or modified. This is where understanding the project’s status becomes important.
Checking Project Status
Before committing changes, it’s important to know what Git sees in your project. The git status command shows:
Which files are untracked (new files Git isn’t tracking yet)
Which files are modified but not staged
Which files are staged and ready to be committed
Using git status helps you understand the current state of your working directory and staging area. It ensures you don’t miss any changes or accidentally commit unwanted files.
Staging Changes
After making changes in your project, Git needs to know which changes you want to include in the next commit. This is done using the staging area.
The git add . command adds all modified and new files in the current directory to the staging area. Think of it as telling Git: “Include these changes in the next snapshot.”
Only the changes in the staging area will be saved when you create a commit. This gives you control over exactly what gets recorded in your project history.
Saving Changes
Once your changes are staged using git add, you save them to the repository with a commit. The git commit -m "message" command creates a snapshot of the staged changes along with a short message describing what was done.
Commits act like checkpoints in your project. Each one records the state of your project at a specific moment, making it easy to review history, undo mistakes, or understand how the project evolved over time.
Viewing History
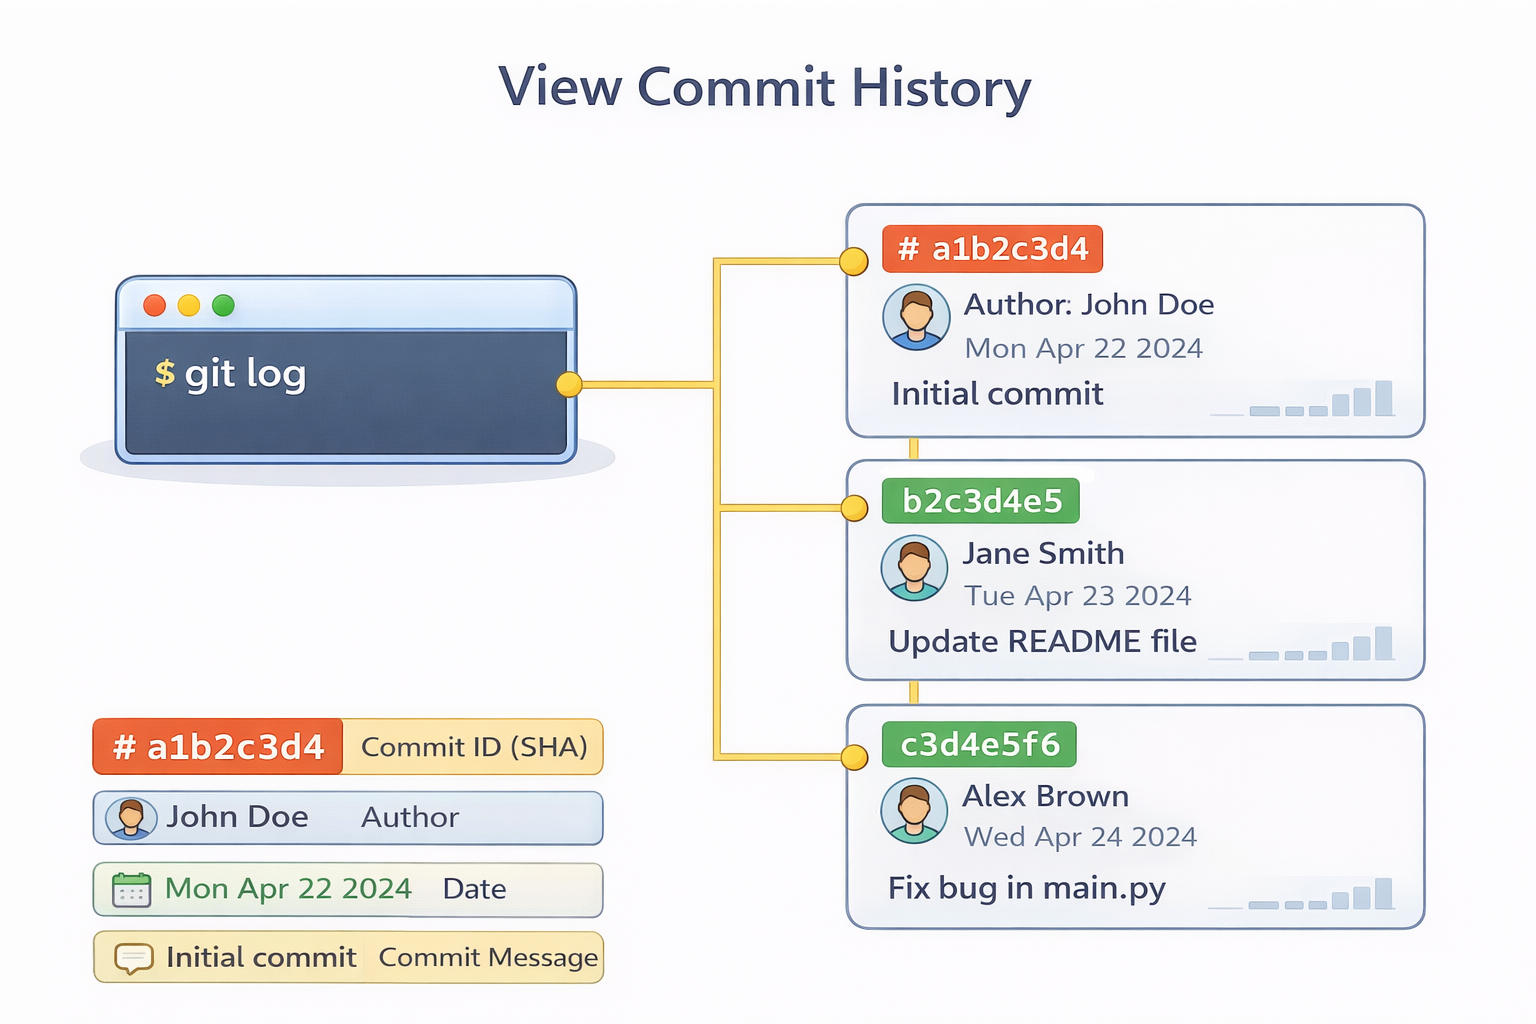
After creating commits, you can see the project’s history using the git log command. It lists all commits in the repository, showing the commit ID, author, date, and the message you provided.
git log helps you understand how the project has evolved, track changes, and identify when a specific change was made. It’s an essential tool for reviewing progress and troubleshooting issues in your project.
Comparing Changes
Git allows you to compare the changes between any two commits in your repository. This is useful when you want to see what changed over a period of time or review specific updates.
# To compare two commits, you use their commit IDs:
git diff <commit_id1> <commit_id2>
Git will show the differences line by line for all files that were modified between those two commits. This makes it easy to understand how your project evolved and identify specific changes. Comparing commits helps in code reviews, debugging, or just tracking progress over time.
Undoing Changes
Sometimes you need to undo changes in a project, and Git provides two main ways to do this:
git revert
Creates a new commit that undoes the changes of a previous commit. It’s safe because it doesn’t alter the project history. Use this when you want to undo something without affecting other commits.git reset
Moves the current branch pointer to a previous commit. It can remove commits from the history, which is more powerful but riskier. Use it carefully, especially if other people are working on the same branch.
For beginners, it’s usually better to start with git revert to safely undo changes while keeping history intact.
A Simple Git Workflow
Here’s how the main Git commands fit together in a typical workflow:
Initialize the project – Use
git initto start tracking a project.Check status – Run
git statusto see which files are untracked, modified, or staged.Stage changes – Use
git addto select files for the next commit.Commit changes – Run
git commit -m "message"to save a snapshot in the repository.Review history – Use
git logto see previous commits and track project progress.Compare changes –
git diffhelps you see what has changed before committing.Undo mistakes – Use
git revertorgit resetto safely fix errors or remove commits.
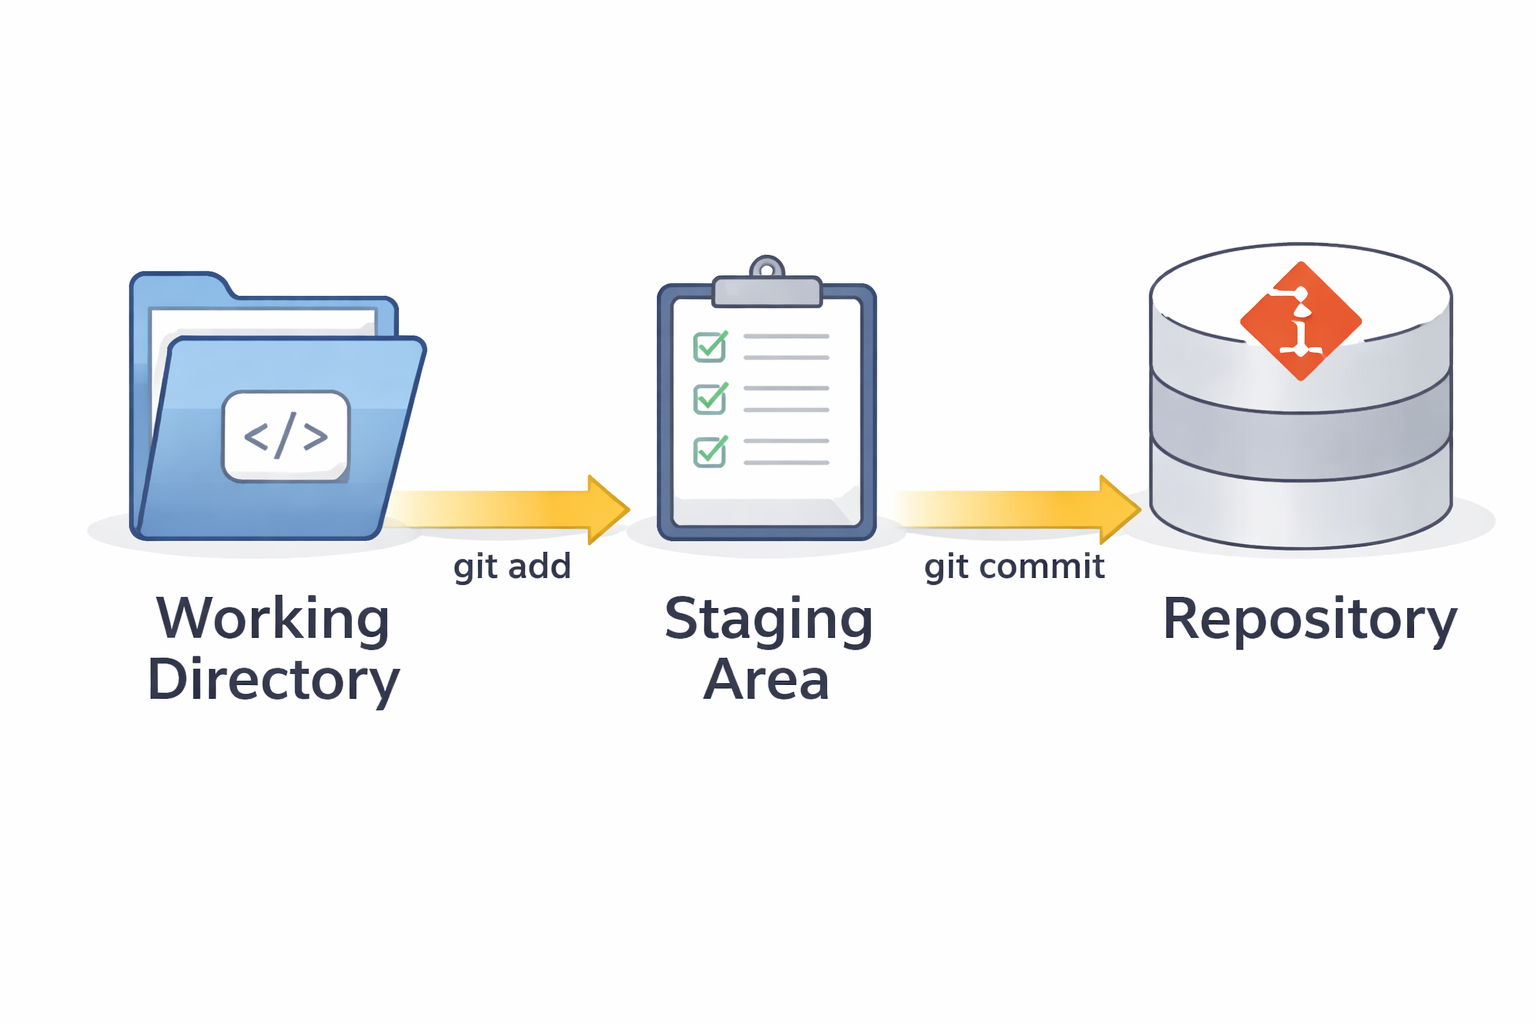
This workflow follows the sequence: working directory → staging area → repository, which helps you maintain control and clarity over your project at every step.
Tracking a Simple Project
Let’s see how the Git workflow works in a small project. We’ll initialize a repository, create a file, make changes, and track them using Git commands.
Initialize the repository
This sets up Git to start tracking your project.
 mkdir my-project-folder
 cd my-project-folder
 git init
Create a file and check status
Create a simple file and see what Git notices.
 echo "Hello World" > file.txt
 git status
Stage and commit the file
Tell Git to include this file in the next snapshot and save it.
 git add file.txt
 git commit -m "Add initial file"
Make a change and commit it
Update the file, stage the change, and save a new version.
 echo "This is my project" >> file.txt
 git add file.txt
 git commit -m "Update file with project info"
View commit history
Check the history of your commits to see your progress.
git log
Conclusion
Git is a powerful tool that helps you track changes, experiment safely, and maintain control over your projects. By understanding core concepts like repositories, commits, branches, and HEAD, and by using commands such as git init, git status, git add, git commit, and git log, you can confidently manage your code and its history.
Start practicing with small projects, follow the basic workflow, and gradually explore more commands as you gain experience. With Git, managing changes becomes predictable, organized, and safe.